
FEATURES
GREATER STABILITY, GREATER DURABILITY, GREATER PRECISION
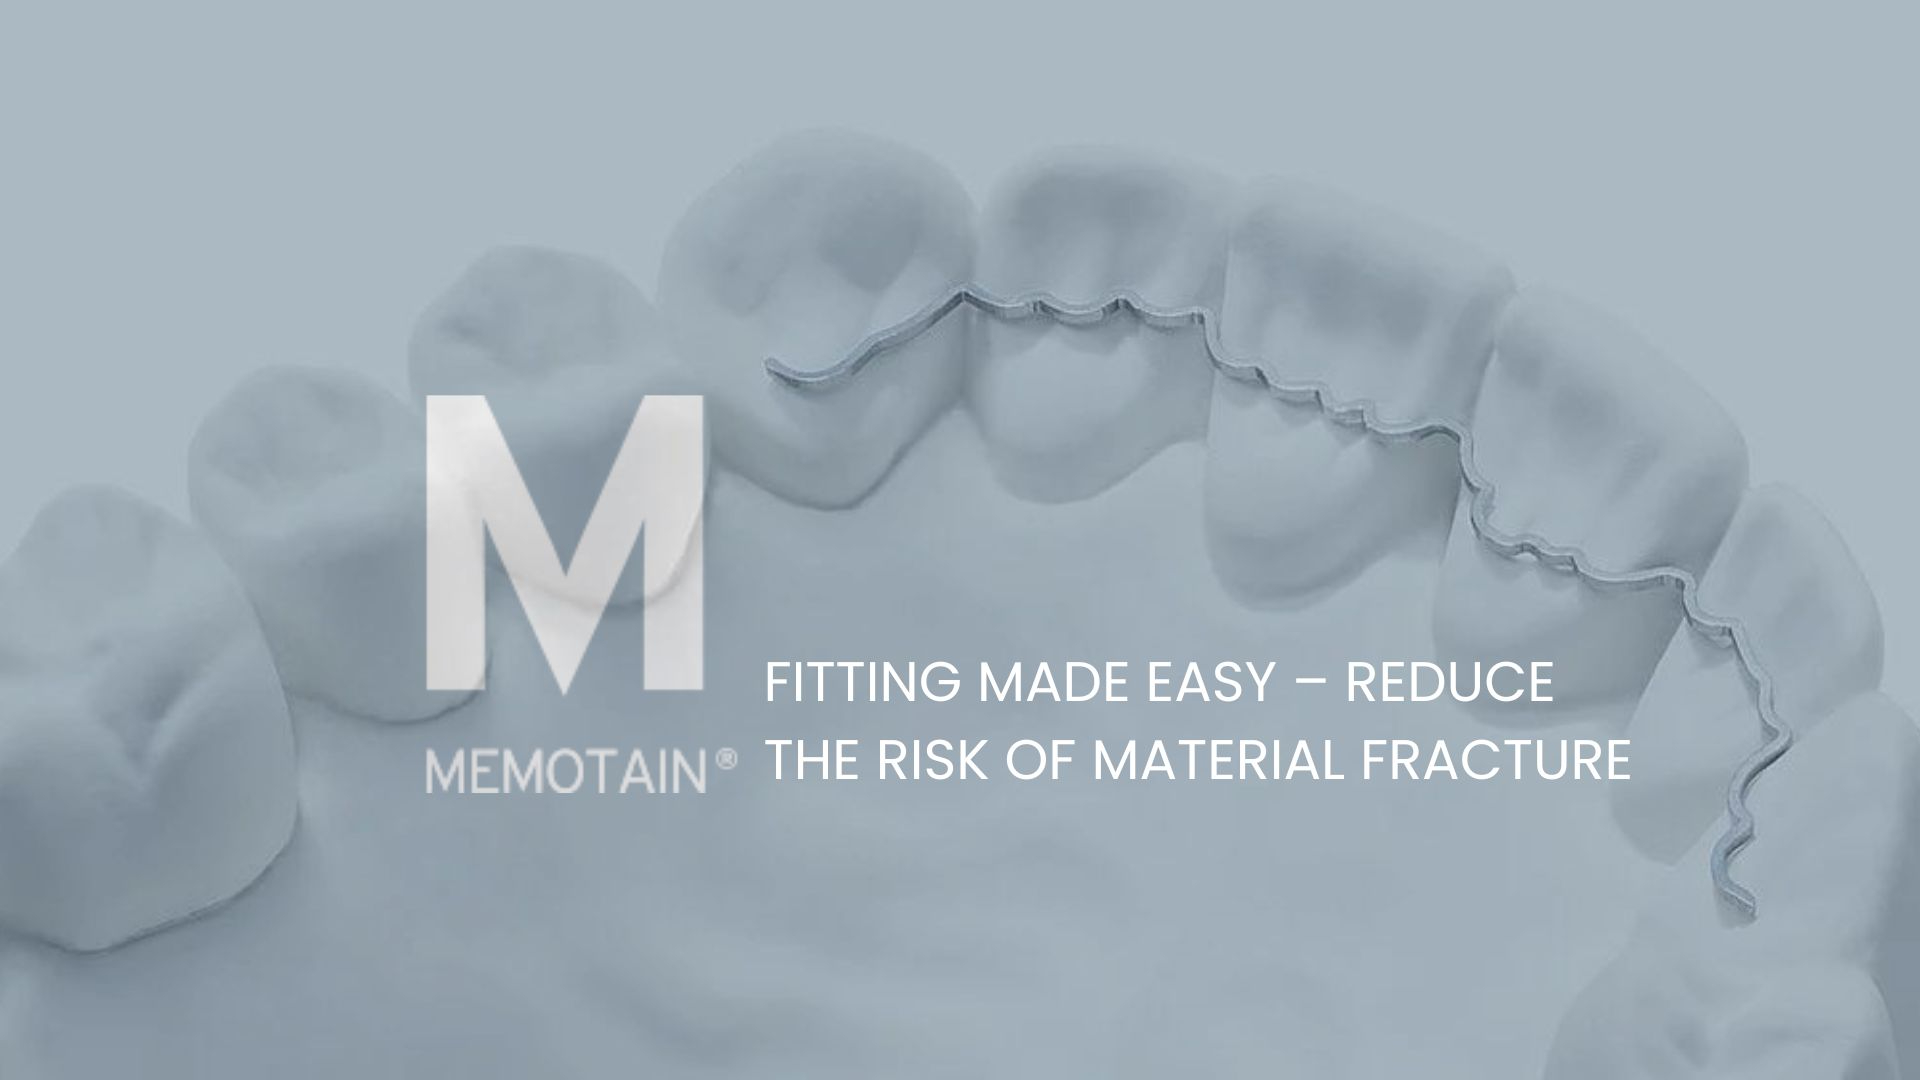
Progress means to continue developing! And that is the reason why we continue optimising MEMOTAIN ® . The results of our efforts: improved designs, intelligent anchoring and a material fracture rate of only 1%. This makes MEMOTAIN ® retainers more durable and ensures a more accurate fit compared with any other conventional retainer.
Irrespective of which case of malocclusion you have treated successfully, the retention phase is a must to ensure long-term success. To achieve this, you need a retainer that lives up to its name. A retainer like MEMOTAIN®. The new MEMOTAIN® 2.0 features such as smoothing specific points in interdental areas play
a major role in significantly improving stability. In addition, partial retention elements provide greater support at the bonded areas. Practical: All new features of the MEMOTAIN® 2.0 retainer are planned on a case-by-case basis to meet the individual requirements. Simply order and start bonding.
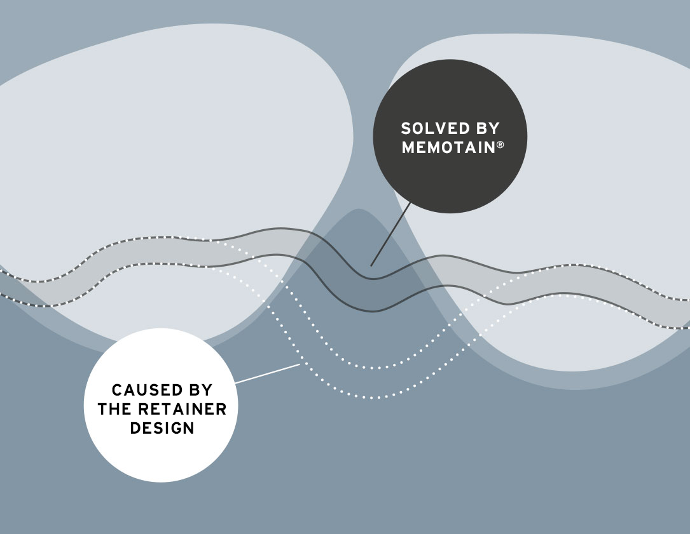
PARTIAL ANCHORING FOR BETTER SUPPORT
Practitioners who frequently bond retainers are well aware of the problem: the smooth wire often slides out of the bonded area, especially in the case of straight dental anatomical structures. To prevent what is also known as the sliding effect, we have now integrated the concept of partial retention into the MEMOTAIN ® system. Partial retainers are interlocked in the bonded area. This effectively prevents the main retainer from sliding out of the bonded points.
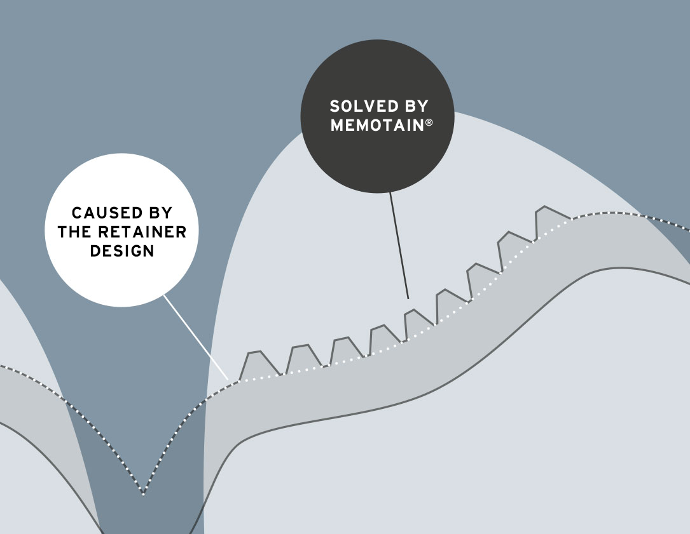
CUSTOM DESIGN FOR GREATER STABILITY
Retainers and architecture follow similar principles: rounded arches usually provide greater stability in contrast to pointed arches. And we have followed precisely this principle for the optimisation of MEMOTAIN ® . Interdental areas that are too sharp or pointed can increase the risk of material damage and fracture. We therefore automatically perform partial smoothing of these sensitive areas without compromising on the fit or wear comfort.
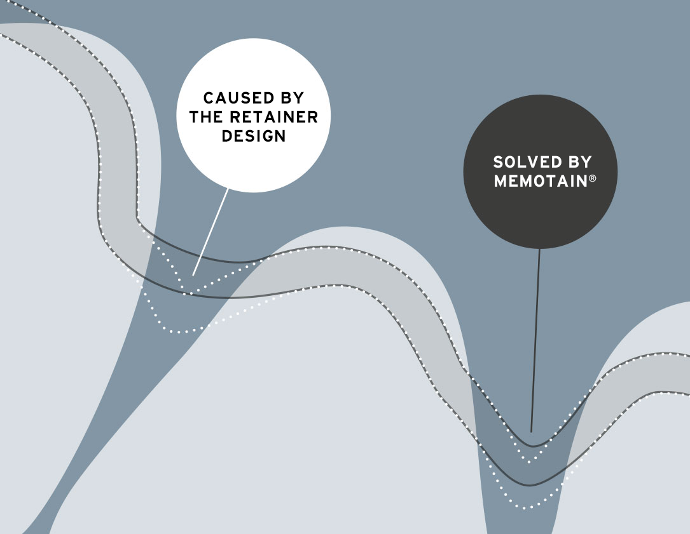
PARTIAL DISTANCES CREATE SPACE FOR PAPILLAE
So far, we have always had to compromise in the treatment of patients with pronounced papillae. Either the retainer was positioned deep into the oral cavity or it had to be divided. A new MEMOTAIN
®
2.0 feature has now found an elegant and effective solution to this problem too. Partial distances ensure that a small area is kept at a distance from the tooth. This creates space and also prevents the retainer from sliding away from the centre of resistance.
BONDING INSTRUCTION
We are pleased that you have decided to use MEMOTAIN®. We would like to provide you with a step by step bonding instruction for a clinically correct transfer of the MEMOTAIN® retainer.
Information regarding the upper jaw: After fixing the MEMOTAIN® use an occlusion film to check, check whether there are any early contacts on the bonding surfaces and remove them.
What types of composites are recommended? Both high-filled and low-filled composites can be used to attach a MEMOTAIN® retainer. It is important to ensure that the transition from the bonding surface to the natural tooth is as smooth as possible.
Low-filled composites (flow): These composites leave the patient with a noticeably smooth and comfortable surface.
High-filled composites: Although this composites is more resistant to abrasion than flow due to the higher proportion of filling material, the tongue perceives high-filled composites as rougher. This feeling of roughness can be reduced by applying a layer of bonding afterwards.
Additional information: When making a lingual retainer, please note that you should carefully
remove the old bonding surfaces before taking the impression.
BONDING INSTRUCTION
MEMOTAIN
QUALITY INSPECTION:
Always check the fitting accuracy of
MEMOTAIN® on the supplied working
model before insertion. It can also
be helpful to use our enclosed
positioning document.

1. SANDBLASTING
Before inserting the
MEMOTAIN® retainer, the
lingual surfaces of the
teeth must be cleaned
thoroughly. First remove
plaque with an ultrasound
device (polishing pastes
are not suitable).
Tip: The additional use of a
sandblaster or AirFlow®
improves the longevity of
the bonding surface.
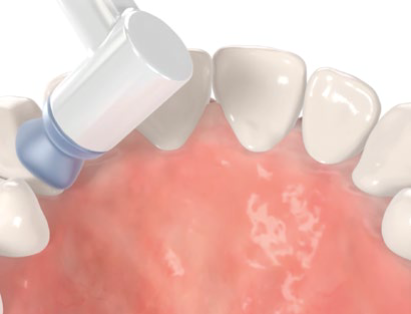
2. CLEANING
Then remove plaque with a
polishing brush and finally
polish with the rubber cup.
3. ETCHING, RINSING AND
DRYING
Etch all affected teeth with
37% phosphoric acid.
Please note the general
application time of the
manufacturer! Rinse off the
etching gel thoroughly after
the specified application
time.
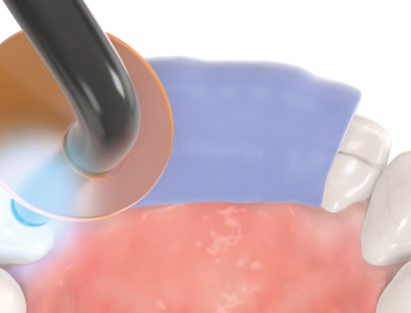
4. PRIMER
Please ensure that the lingual
surfaces are kept dry during
the bonding process. The use
of DryField® or other aids
for tongue shielding ensures
perfect results. Now apply the
bonder (primer) to the lingual
surfaces to be treated.
Please note the application
time and curing time of the
manufacturer!
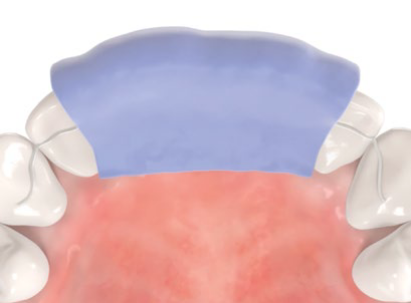
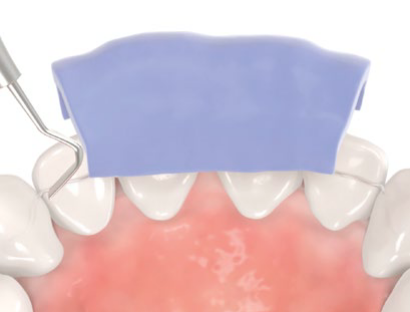
5. TRANSFERRING
Place the transfer cap
together with MEMOTAIN®
in the patient's mouth.
Carefully guide the transfer
cap over the cutting edges
and check the general fit
after application.
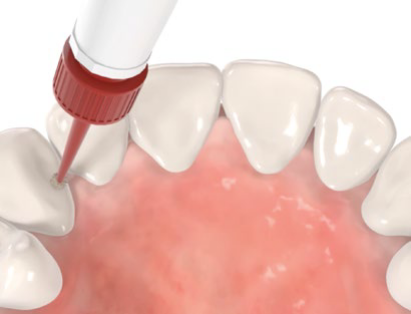
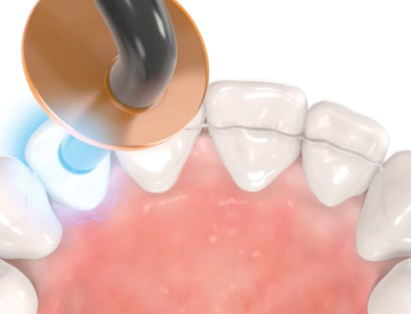
6. BONDING AND
LIGHT-CURING OF THE
ANCHOR TEETH
Apply the composite to the
anchoring teeth and mould
them with a fine probe. The
bonding surfaces should be
wide and flat. In doing so,
the layer thickness must
never be less than 1 mm.
Then harden the bonding
surfaces with a UV lamp.
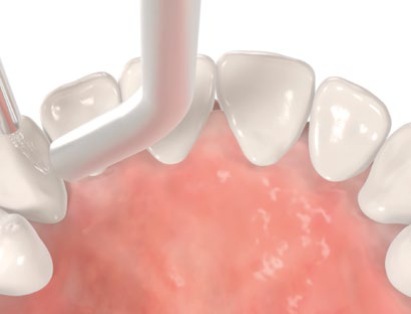
7. REMOVING THE
TRANSFER CAP
For perfect removal of the
transfer tray, attach a
suitable instrument so that
the MEMOTAIN® is fixed
(ligature adapter, Heidemann spatula or probe)
while carefully removing
the transfer cap.
8. BONDING AND
LIGHT-CURING OF THE
REMAINING TEETH
Repeat Step 6 for the
remaining teeth. Beware of
and check if there are any
potential early contacts in
the upper jaw.
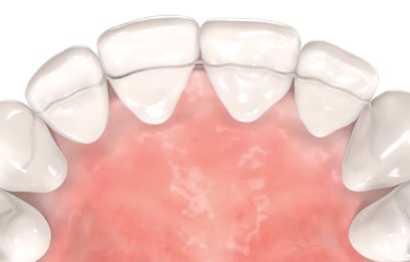
THE PERFECTLY FITTED
MEMOTAIN® RETAINER!
Finally, and where necessary,
use a probe to check whether
the plastic has enclosed the
retainer evenly everywhere.
In addition, with OK retainers,
you can check whether there
are still contacts in the
bonding surface and polish
them away if necessary.
BONDING INSTRUCTIONS VIDEO
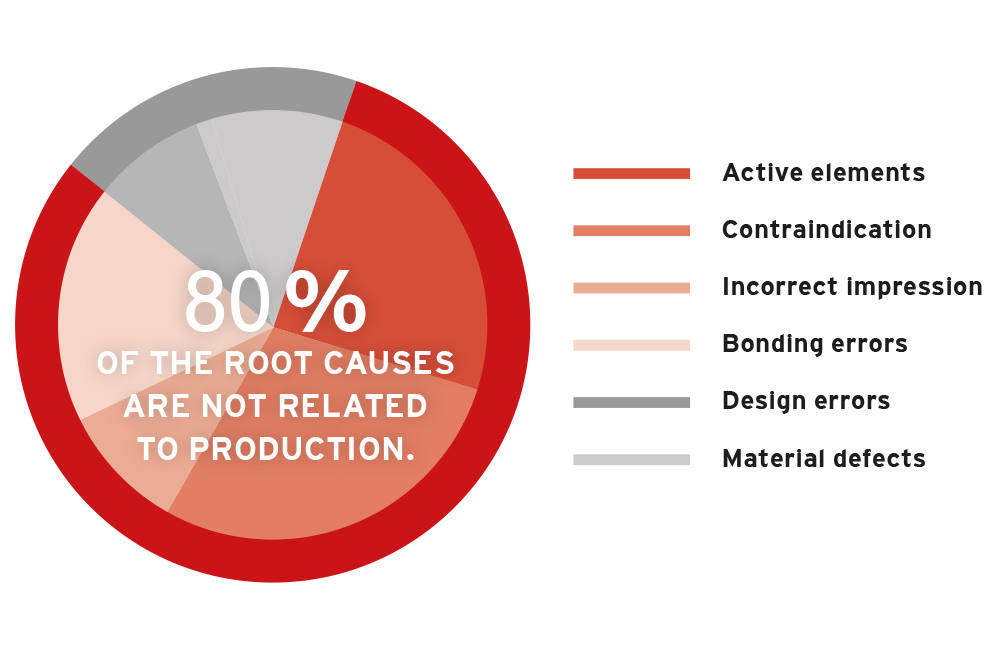
COMMON CAUSES FOR RETAINER FRACTURES
It is annoying for doctors and patients alike when a retainer breaks. This is rarely due to a faulty design or faulty materials. In fact, very frequently, the causes for fractures are not related to production. As part of our quality assurance measures, we have thoroughly examined all rejects and customer complaints in order to identify the most frequent root causes for such faults.
TIPS AND TRICKS FOR TREATMENT WITH MEMOTAIN® RETAINERS

9 STEPS TO THE PERFECT MEMOTAIN® FIT
Our illustrated bonding instructions were developed with the aim of making the clinically proper transfer of MEMOTAIN
retainers as easy as possible for you. The instructions not only show a detailed overview of the individual steps but also include helpful tips and material recommendations.

To install this Web App in your iPhone/iPad press
![]() and then Add to Home Screen.
and then Add to Home Screen.
